Best Basement Flooring Options for Every Budget
Moisture is the enemy. Here are the flooring systems that handle it, ranked by durability, cost, and contractor margin.
Why Basement Floors Are Different
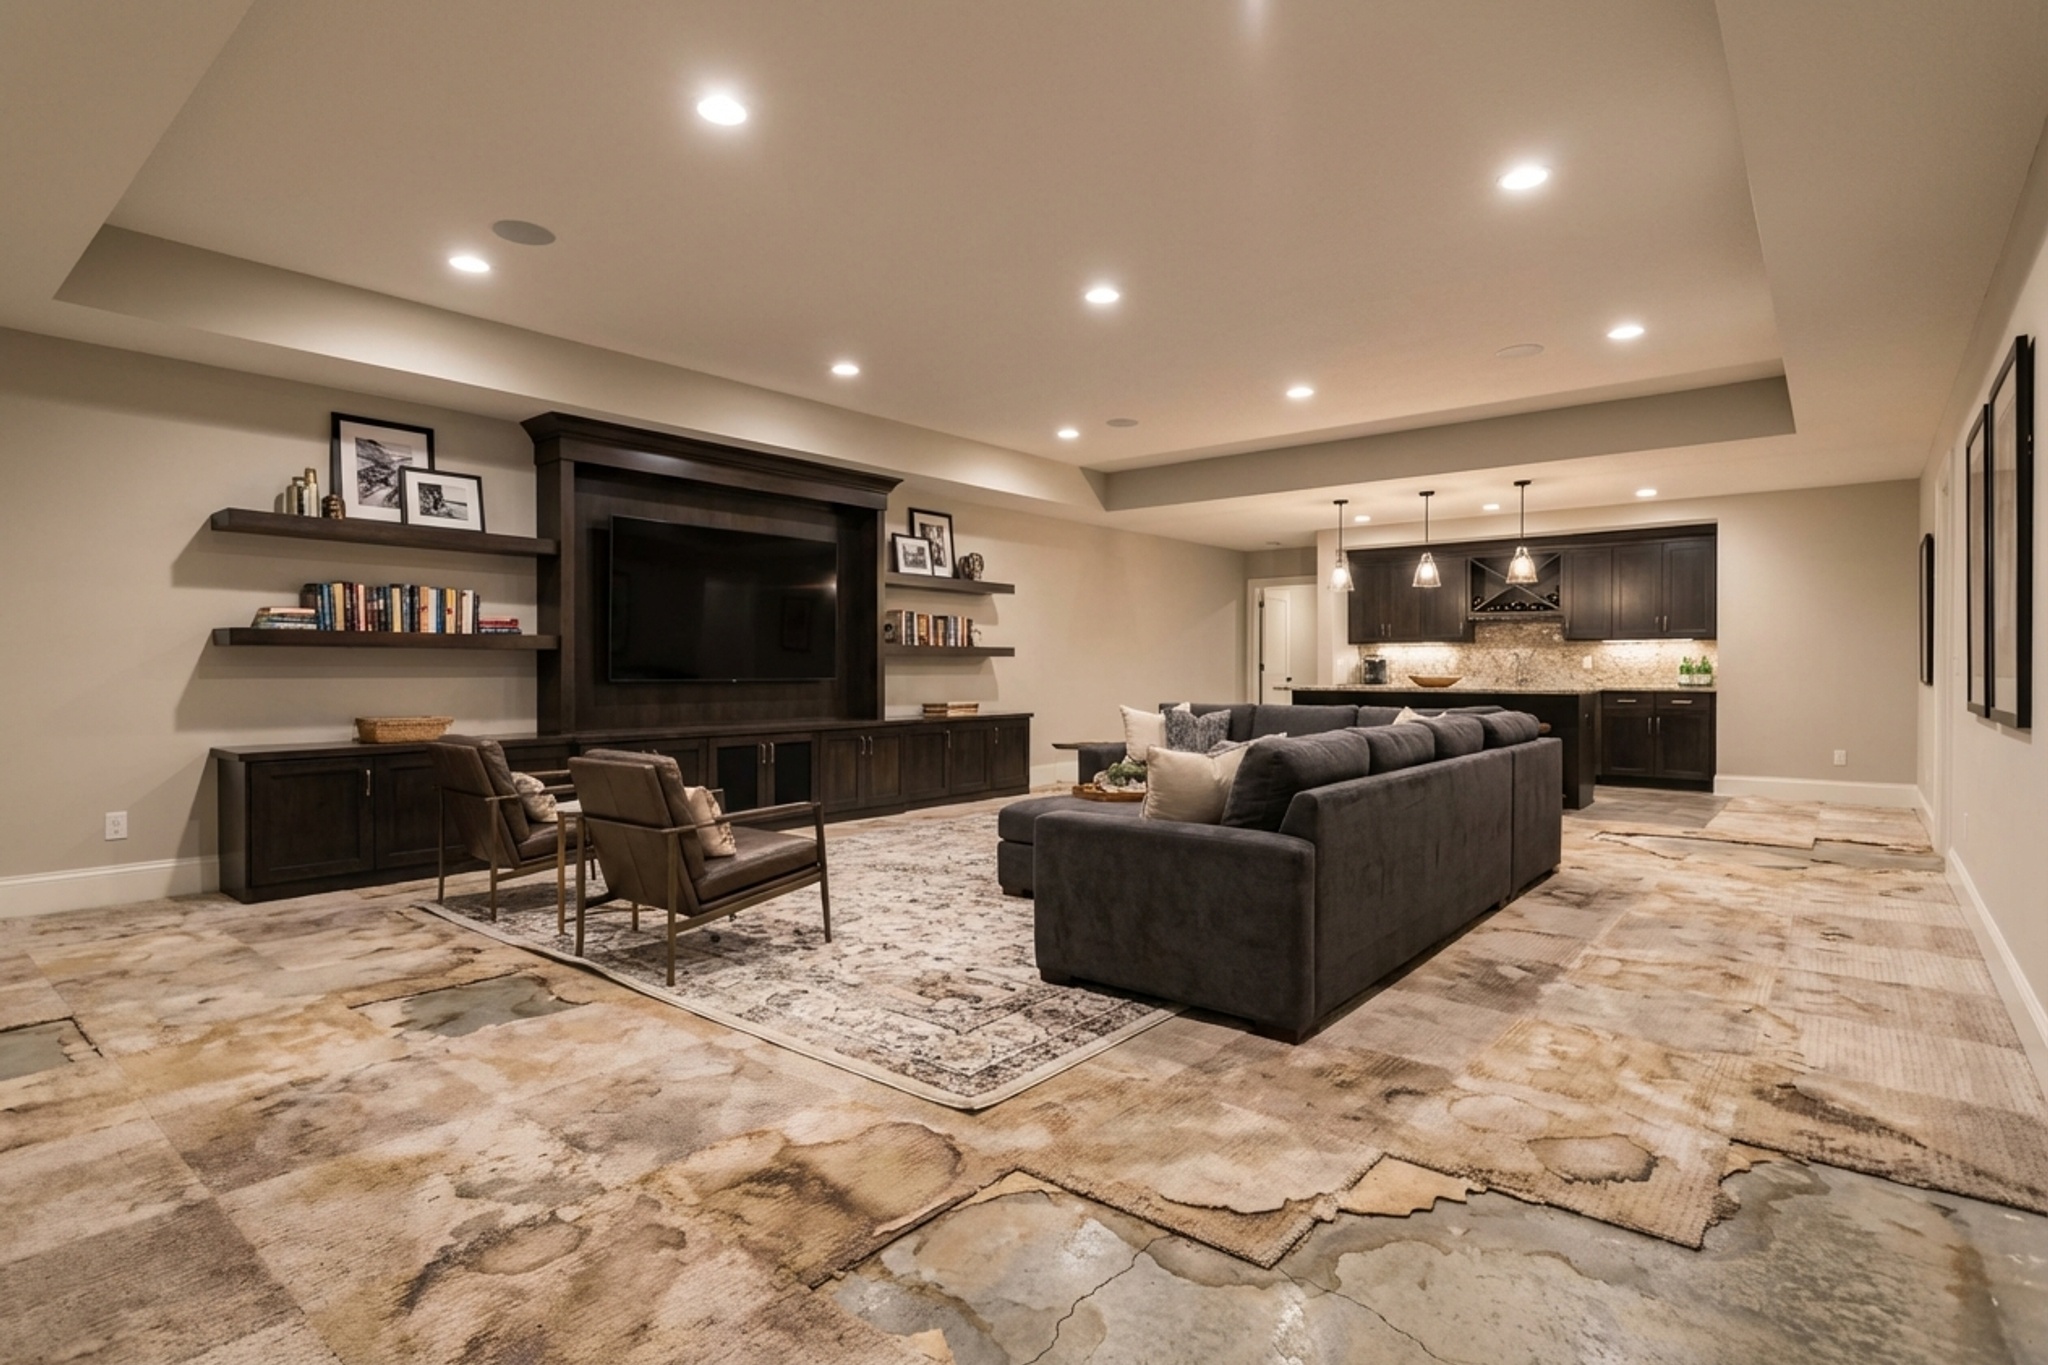
Basement flooring is a different animal from everything above grade. The slab sits below the water table in many regions, so moisture migrates upward through the concrete via hydrostatic pressure. Add condensation from temperature differentials between cool concrete and warm indoor air, plus vapor transmission through the slab itself, and you have a perpetual moisture challenge that no amount of product selection can solve on its own.
About 60% of American basements have some form of moisture problem. That means six out of ten basement flooring jobs require a moisture management strategy before anyone picks a color. Contractors who skip this step end up with callbacks, delaminating coatings, and unhappy homeowners. Contractors who lead with it close more deals and build their reputation as someone who does things the right way.
60%
Of basements have moisture issues
Source: American Society of Home Inspectors
3 lbs
Max MVER for most epoxy systems
per 1,000 sq ft / 24 hours
$2,500–$9,600
Typical 800 sq ft project
Depending on system chosen
The 3-Step Moisture Test Protocol
Run these in order. The plastic sheet test is free and fast. If it passes, the calcium chloride test gives you a number to show the client. If you are working on a high-value project or the slab is older than 20 years, spring for the RH probe.
Plastic Sheet Test (Free, 48 hours)
Tape a 2x2 ft sheet of plastic to the slab with duct tape. Wait 48 hours. If moisture collects on the underside or the concrete darkens, you have active moisture migration. This screens out the obvious cases but does not measure severity.
Calcium Chloride Test (ASTM F1869, $10-15/kit)
Place a pre-weighed dish of calcium chloride under a sealed dome on the slab for 60-72 hours. Weigh it again. The weight gain tells you the Moisture Vapor Emission Rate (MVER). Most epoxy manufacturers require under 3 lbs per 1,000 sq ft per 24 hours. Costs about $10 per kit and you need three tests for the first 1,000 sq ft.
In-Situ RH Probe (ASTM F2170, Gold Standard)
Drill a hole into the slab, insert a relative humidity probe, and seal it for 72 hours. This measures moisture throughout the full slab depth, not just the surface. Most flooring manufacturers now prefer this method. A reading above 75% RH means you need moisture mitigation before coating.
Moisture Mitigation Products
| Product | Type | Coverage | Cost/sq ft | Handles Up To |
|---|---|---|---|---|
| Rust-Oleum Moisture Stop | Epoxy primer | 200-300 sq ft/gal | $0.40-0.60 | 15 lbs MVER |
| Laticrete Hydro-Shield | Moisture barrier | 150-200 sq ft/gal | $0.75-1.00 | 25 lbs MVER |
| XPS Moisture Vapor Barrier | Epoxy barrier + flake-ready | 200 sq ft/gal | $0.50-0.80 | 15 lbs MVER |
| E591 Wet Surface Epoxy | Bonds to damp concrete | 100-150 sq ft/gal | $1.00-1.50 | Active moisture OK |
Warning
Never skip moisture testing. It is the number one cause of basement coating failure. A $10 calcium chloride kit prevents a $5,000 redo. Contractors who test on-site during the estimate close more jobs because the homeowner sees them as the professional who does it right.
Epoxy Coatings: The Highest-Margin Basement Option
$4–10/sq ft
Installed Cost
Materials $1-5, labor $3-5
10–20 years
Typical Lifespan
With quality topcoat
40–60%
Contractor Margin
Highest of all basement options
Epoxy works for basements because it bonds directly to concrete, acts as a moisture barrier, and comes in every style from utility gray to flowing metallics. For basements with moderate moisture, a moisture-mitigating primer goes down first and solves most problems before the base coat.
Which Epoxy System for Which Basement?
- Flake broadcast ($4-7/sq ft installed): The workhorse for workshops, gyms, and general-use basements. Chips hide imperfections and add texture for slip resistance. This is where most residential basement jobs land.
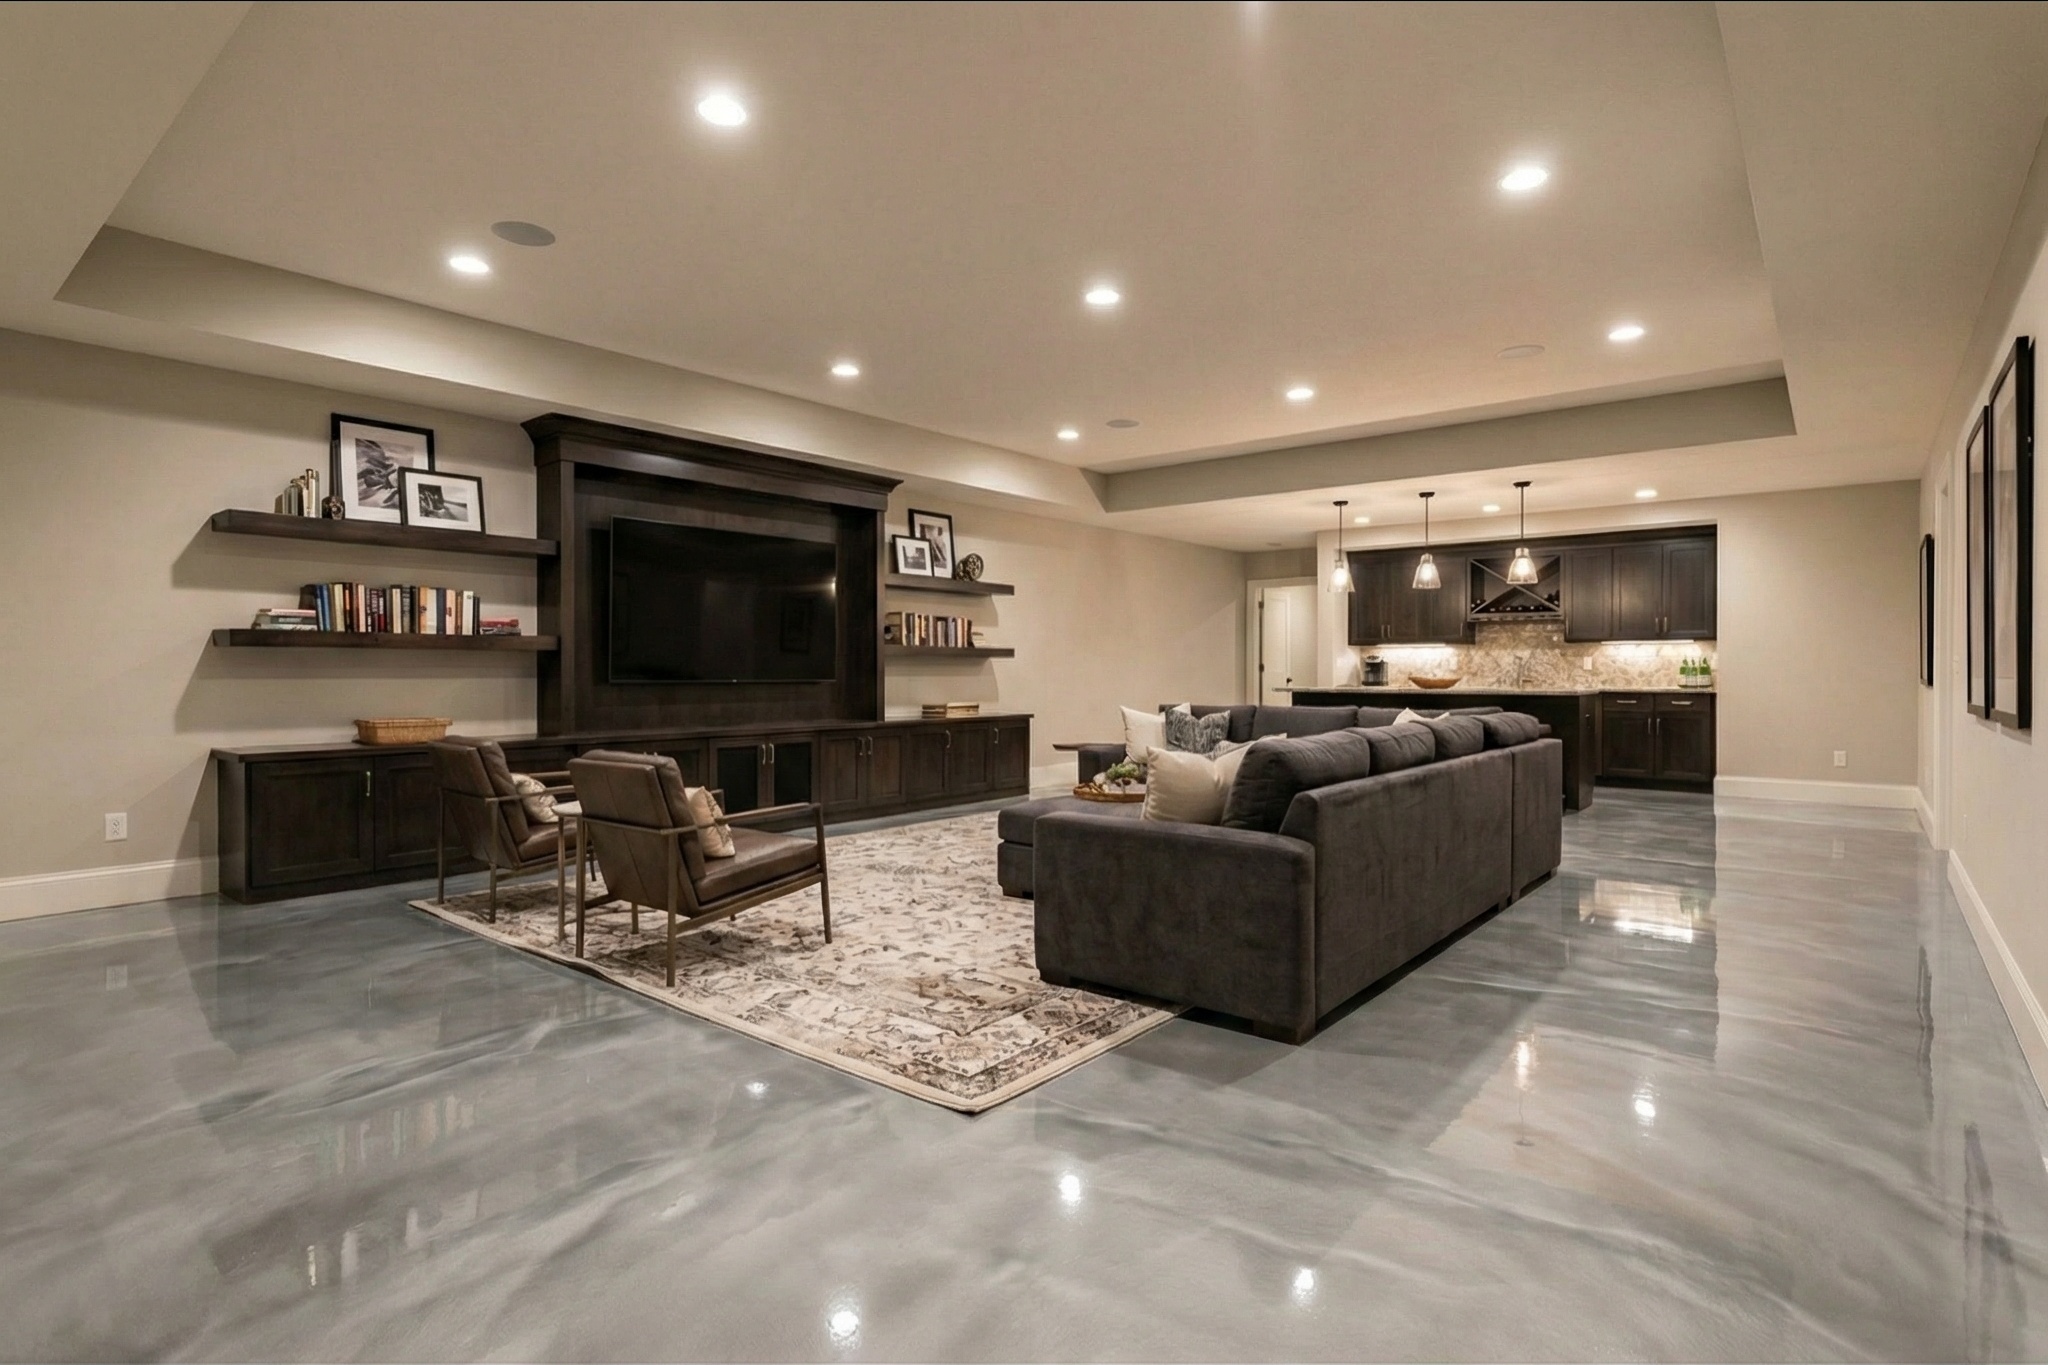
- Metallic epoxy ($8-12/sq ft installed): For finished entertainment spaces, bars, and man caves. Each floor is unique. Show a metallic visualization to a homeowner who came in expecting flake and watch the upgrade happen.
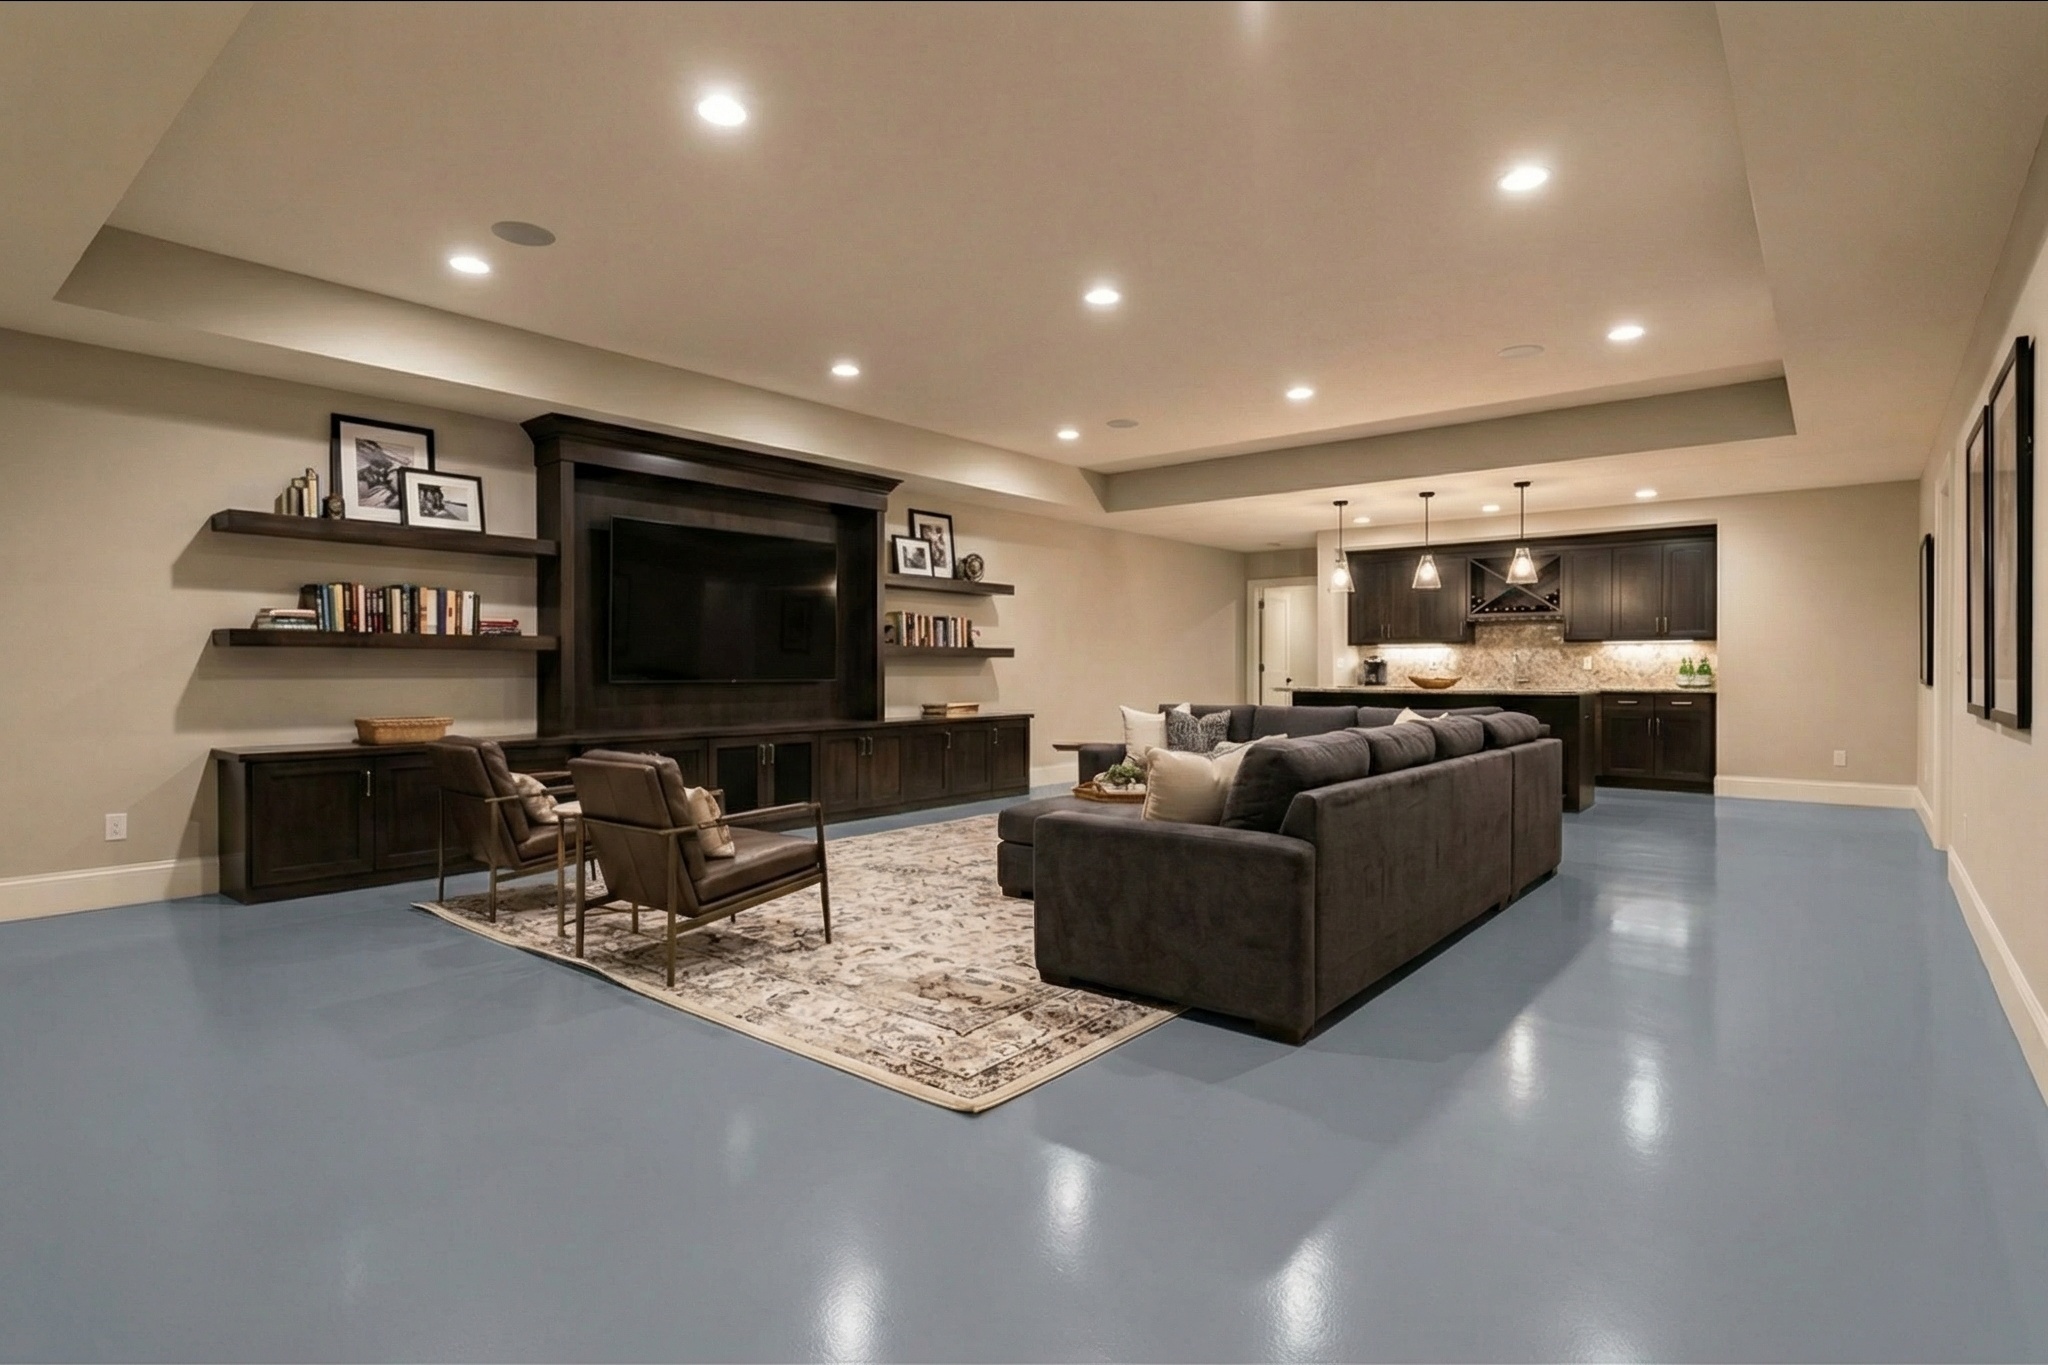
- Solid color ($3-5/sq ft installed): The fastest and cheapest option. Single color coat over primed concrete. Good for utility rooms, storage areas, and laundry spaces where aesthetics matter less than protection.
The VOC Problem Underground
Basements have poor ventilation. This changes the equation on product selection. Solvent-based epoxies and polyaspartic topcoats off-gas significantly during cure. In a garage with the door open, this is manageable. In a basement with one window and forced-air HVAC that circulates odor through the whole house, it becomes a real problem.
Use 100% solids epoxy or low-VOC water-based systems whenever the basement connects to living space. The extra cost per gallon is marginal compared to the callback risk from a family that cannot tolerate the fumes. One contractor on a flooring forum described getting a call at 2 AM because the homeowner's kids were complaining about the smell two floors up from a basement polyaspartic job.
Common Failure Modes (From Real Jobs)
These are the problems that show up on contractor forums and Reddit threads. Knowing them helps you explain to DIY-curious homeowners why professional installation matters.
- Moisture blush: White, cloudy spots that appear after the floor gets wet. Caused by moisture pushing through pinholes in the coating. Happens when the primer did not fully seal the slab or no moisture test was performed.
- Fish-eye: Small circular craters in the coating, usually near the edges or at stairs. Caused by contaminants on the slab surface (oil, silicone, cleaning products). Prevention: thorough diamond grinding and solvent wipe before priming.
- Mica "minnows": In metallic epoxy, unmixed pigment powder creates small tadpole-shaped streaks instead of a smooth flowing pattern. Prevention: strain the mixed coating through a filter before pouring.
- Scratching: Surface scratches from brooms, vacuums, or moving furniture. Usually means the urethane or polyaspartic topcoat was too thin or the wrong product. A quality topcoat at proper mil thickness handles normal residential use without issue.
Pros
- Creates a functional moisture barrier on the slab
- Durable: 10-20 year lifespan with quality topcoat
- Highest contractor margins of any basement system
- Hundreds of colors, patterns, and finishes available
- Seamless surface prevents mold growth in seams
Cons
- Full cure takes 3-5 days before heavy use
- VOC concerns in poorly ventilated basements
- Temperature sensitive: most products need 55°F+ for application
- Prep-intensive: diamond grinding is non-negotiable
Polished Concrete: Near-Zero Material Cost
$3–6/sq ft
Basic Polish
Higher for decorative finishes
~$0
Material Cost
It is already there
Pure labor
Margin Structure
No inventory to carry
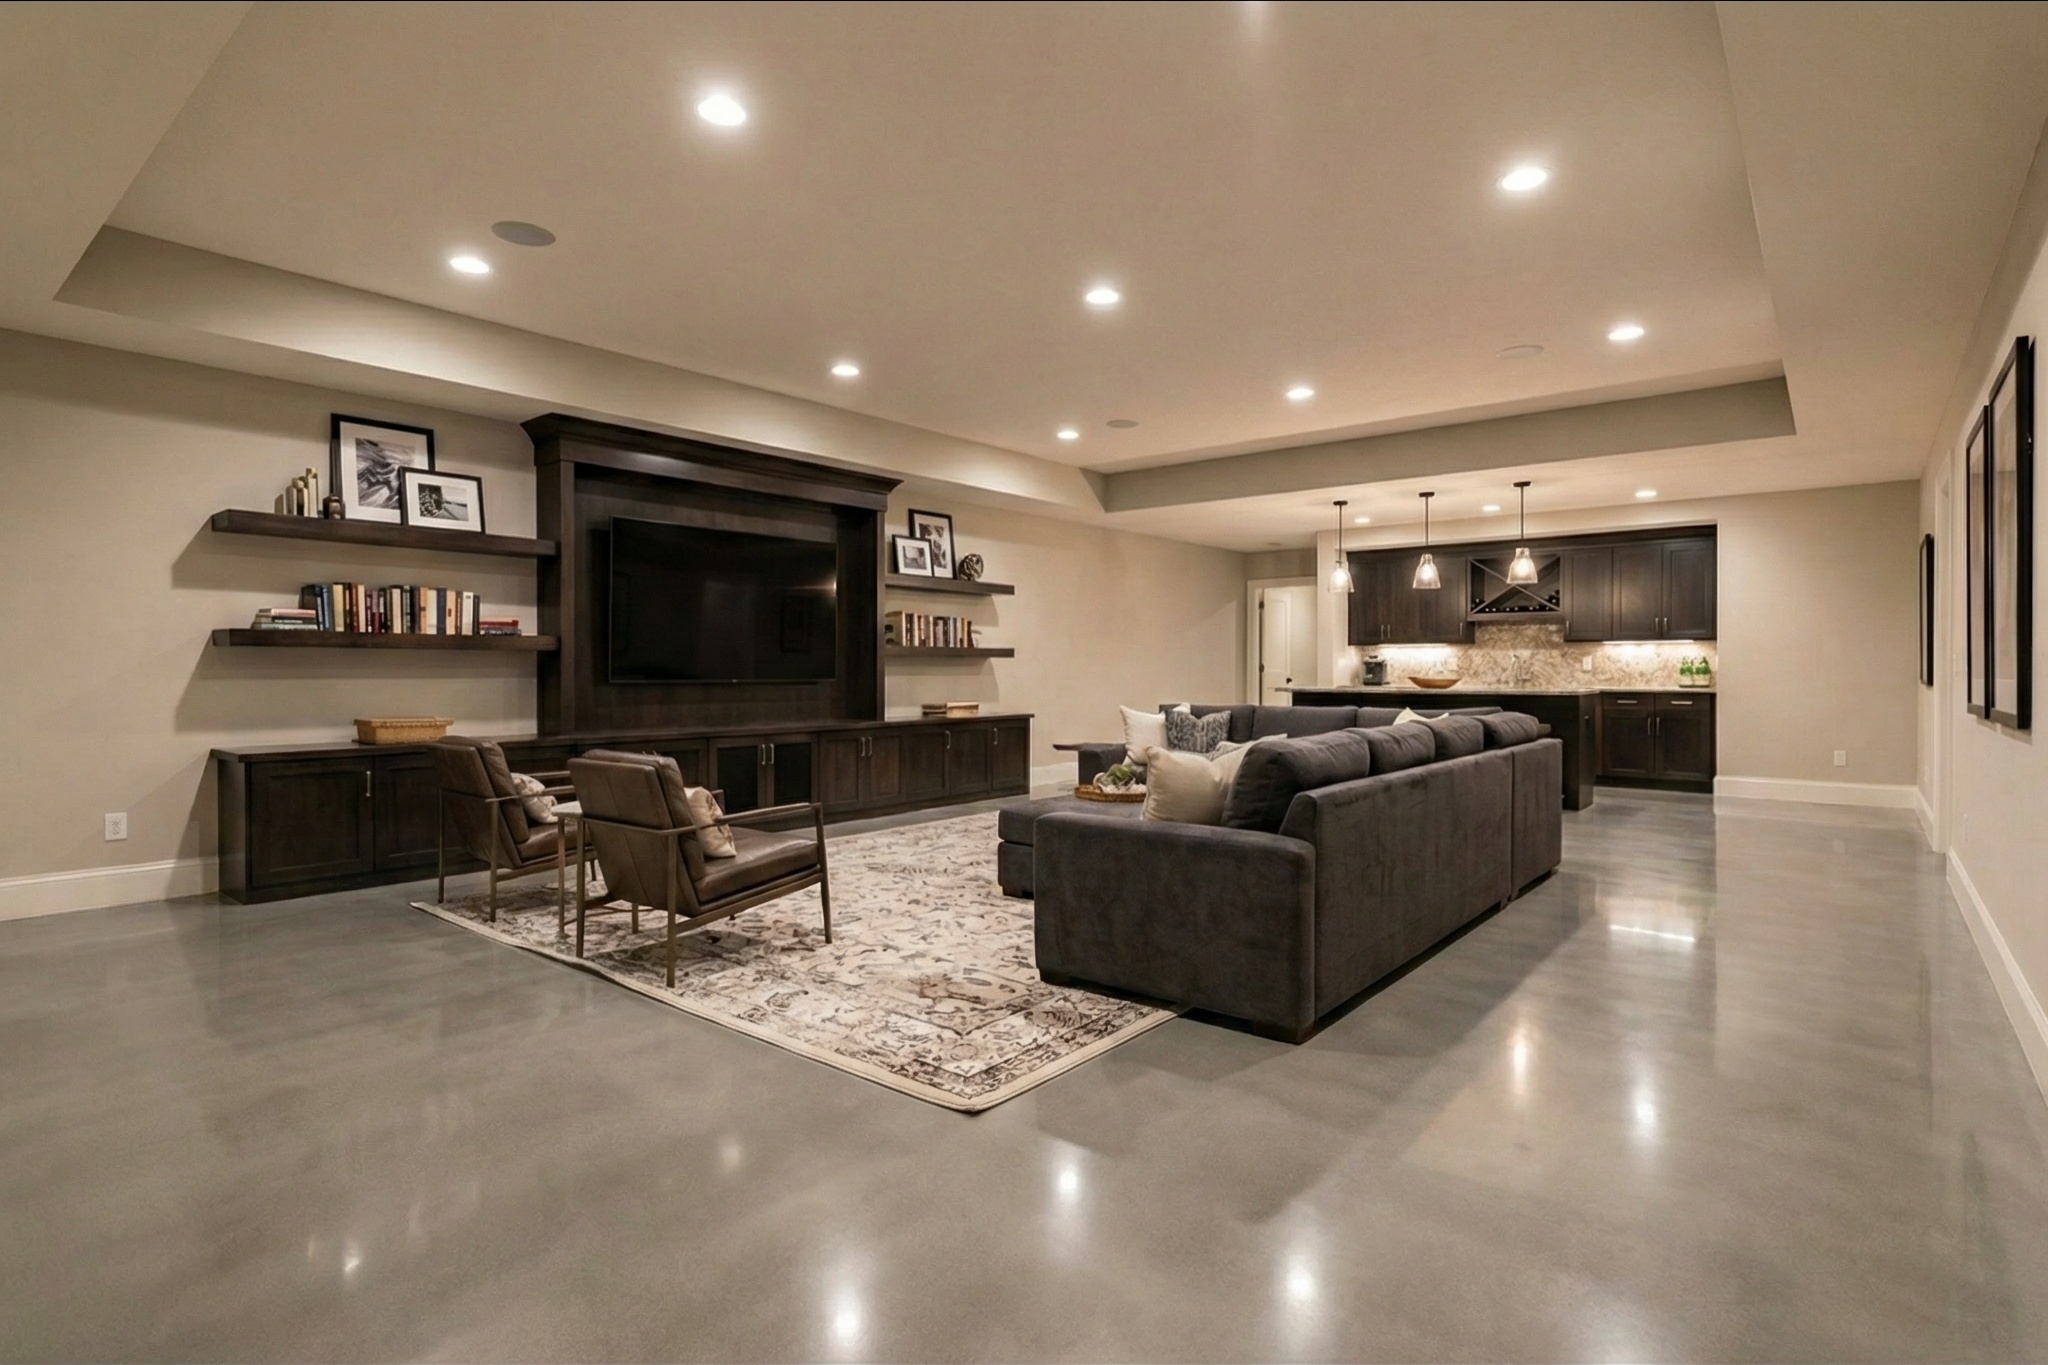
When the existing slab is in decent condition, polishing costs less than any other finished floor option. You are not buying material or stocking inventory. Diamond grinding to 400-800 grit creates a smooth, reflective surface that looks intentionally designed rather than unfinished, and the homeowner can walk on it the same day.
The catch is equipment. A planetary grinder, wet/dry vacuum, densifier, and diamond tooling represent a meaningful investment. Contractors who already own grinding equipment for surface prep can add polished concrete as a service with almost no additional cost. Those who do not own the equipment can rent, but the math only works on larger jobs.
Grit Progression for Basement Slabs
50-grit diamond
Removes existing sealers, paint, and thin coatings. Opens the concrete pores. This is the heavy lifting stage.
Apply densifier
Lithium silicate or sodium silicate hardens the concrete surface and fills micro-pores. Let it soak in for 15-20 minutes, then remove excess.
100-grit pass
Begins refining the surface. Most scratches from the 50-grit pass disappear here.
200-grit and 400-grit passes
Progressive refinement. At 400 grit, the floor has a matte sheen. Most basement jobs stop here unless the client wants a high gloss.
Final sealer
Penetrating sealer for stain resistance. Apply with a microfiber mop. Two coats, 30 minutes apart.
Pros
- Cheapest finished floor option (labor only)
- Naturally moisture-resistant surface
- Modern, industrial aesthetic that photographs well
- No material inventory to carry or store
- Zero VOC during installation
Cons
- Equipment investment or rental cost
- Slab must be in good condition (no major cracks or patches)
- Cannot hide existing damage or color variation
- Limited color options without adding stain
- Cold underfoot in winter without radiant heat
Luxury Vinyl Plank: The Safe Recommendation
LVP dominates finished basement living spaces for a reason. It is 100% waterproof, comfortable underfoot, and available in wood and stone patterns realistic enough to fool most visitors. The floating click-lock installation does not bond to the concrete, so moisture can pass beneath the floor without causing damage. For contractors who do not specialize in coatings, LVP is a reliable recommendation that satisfies homeowners looking for a residential feel.
Top LVP Brands for Basements (2026)
| Brand | Core Type | Key Feature | Price Range | Best For |
|---|---|---|---|---|
| COREtec Plus/Pro | SPC (stone polymer) | Attached cork underlayment | $4-8/sq ft | Comfort + noise reduction |
| Shaw Floorte Pro | Rigid core | Low-VOC, high wear layer | $3-7/sq ft | Durability in high traffic |
| Lifeproof | SPC waterproof | Budget-friendly, widely available | $2-5/sq ft | Cost-conscious projects |
| Mohawk RevWood | WPC (wood polymer) | Pet-proof performance | $3-6/sq ft | Homes with pets or kids |
Installation Over Concrete
- 1Test moisture using the same ASTM standards as epoxy. LVP manufacturers also set moisture limits.
- 2Install a vapor barrier underlayment. Some LVP (like COREtec) comes with underlayment attached. If not, roll out 6-mil poly or a combined vapor barrier/cushion pad.
- 3Acclimate planks in the basement for 48 hours. Let them adjust to the temperature and humidity of the space.
- 4Float-install with click-lock. Do not glue to the slab. Floating lets the floor move with seasonal changes without buckling.
- 5Leave 1/4 inch expansion gaps at all walls, columns, and transitions. Cover with base molding.
Good to Know
LVP handles gradual floor drain slopes better than you might expect. If the slope is less than 3/16 inch per 10 feet, a quality underlayment compensates for the variation. Do not pour leveler over your floor drains. You will need them someday.
Pros
- 100% waterproof core material
- Warm and comfortable underfoot
- Fast installation (400-600 sq ft per day for a 2-person crew)
- Easy to replace individual planks if damaged
Cons
- Thinner contractor margins than epoxy or polished concrete
- Can dent under heavy loads (gym equipment, safes)
- Seams allow edge moisture over time if vapor barrier fails
- Not suitable for unheated basements (cold cracks the core)
- Reads as "flooring" rather than a full space transformation
Rubber and Interlocking Tiles: Zero-Prep Options
$2–5/sq ft
Material Cost
No installation labor required
Zero
Surface Prep
No adhesive, no grinding
Same day
Install Time
Walk on immediately
Rubber flooring and interlocking tiles fill a specific niche: basements where function matters more than finish. They are moisture-tolerant, cushioned, and require zero adhesive or surface prep. Lay them directly on the concrete and start using the space the same day. The tradeoff is aesthetics. Rubber tiles look like rubber tiles, and everyone knows it.
- Home gyms: The most common basement rubber tile use case. Protects concrete from dropped weights and provides cushioning for joints.
- Kids' playrooms: Soft landing surface, easy to clean, and individual tiles can be swapped if damaged.
- Workshop and utility areas: Chemical resistant, easy to stand on for long periods, and does not show oil or grease stains.
- Temporary or rental situations: Can be removed and reinstalled without damage to the slab underneath.
What to Avoid in Basements
Three flooring types consistently cause problems in basements despite being popular everywhere else in the house.
Hardwood swells and warps when humidity fluctuates, which basements do constantly. Even "engineered" hardwood with a plywood core absorbs moisture at the edges over time. Laminate looks like wood but its fiberboard core acts like a sponge. One slow plumbing leak or a heavy rainstorm and the floor bubbles within hours. Carpet traps moisture underneath where you cannot see it, creating ideal conditions for mold growth that may not become obvious until the smell is everywhere.
Warning
Carpet in basements is a mold factory. If a client insists on softness underfoot, recommend LVP for the main area with a removable area rug. When the basement floods (and basements eventually flood), the rug can be dried or tossed. A glued-down carpet in the same situation means ripping out padding, treating the slab for mold, and starting over.
Even products marketed as "waterproof laminate" fail at the seams. The click-lock joints allow edge moisture to reach the core material over time. In a garage or kitchen, this takes years. In a basement with constant low-level moisture, it can happen within months.
Head-to-Head: All Basement Flooring Options Compared
Basement Flooring Systems at a Glance
| System | Cost/sq ft | Moisture Rating | Durability | Aesthetics | Contractor Margin | Best For |
|---|---|---|---|---|---|---|
| Flake Epoxy | $4-7 | Excellent | 10-20 yrs | Good | High (40-50%) | Workshops, gyms, general use |
| Metallic Epoxy | $8-12 | Excellent | 15-20 yrs | Premium | Very High (50-60%) | Entertainment, bars, man caves |
| Polyaspartic | $5-12 | Excellent | 10-20 yrs | Good | High (40-55%) | Fast turnaround projects |
| Polished Concrete | $3-6 | Good | 15-25 yrs | Modern | Very High (labor only) | Good slabs, modern aesthetic |
| LVP (COREtec/Shaw) | $3-8 | Excellent | 10-15 yrs | Residential | Moderate (25-35%) | Finished living spaces |
| Rubber Tiles | $2-5 | Good | 10-15 yrs | Functional | Low (material markup) | Gyms, playrooms, utility |
Use this table during client consultations. Match the system to their priorities. Budget-conscious homeowners gravitate toward polished concrete or flake epoxy. Homeowners finishing a living space default to LVP. Anyone who sees a metallic visualization of their actual basement rarely goes back to flake. The comparison builds trust because you are presenting options honestly instead of pushing a single product.
How to Close the Basement Job
Basement projects are emotional purchases. The homeowner is turning dead space into a room they actually want to use. That emotional component means visuals sell better than spec sheets and data closes better than pressure.
Run the moisture test on-site
This takes five minutes and costs you nothing. Tape down a plastic sheet during the estimate and tell the homeowner you will check it in 48 hours. This gives you a built-in reason for a second visit and positions you as someone who does thorough work.
Show 2-3 flooring options with visualizations
Take a photo of their basement with your phone. Pull up ShowFloor and generate a before/after with flake epoxy, metallic epoxy, and polished concrete. Let the homeowner react. Their body language tells you which option to quote first.
Present the comparison with real numbers
Walk through the comparison table above. Be transparent about cost differences. When the homeowner sees that metallic costs $4 more per square foot but lasts longer and looks dramatically better, many choose the upgrade without being pushed.
Offer phased or financed options
Not every homeowner can do the full basement at once. Offer to start with the main area and add adjacent rooms later. For larger projects, mention financing. A $6,000 basement floor at $150/month is more palatable than a lump sum.
Margin Insight
Average basement coating job: 800 sq ft at $6/sq ft = $4,800 revenue. Material cost is roughly $800. Your margin after labor: $2,400+. Show the metallic option instead and revenue jumps to $7,200 on the same square footage. The homeowner gets a one-of-a-kind floor. You get a portfolio piece and a referral source.
Featured Materials
Epoxy
Charcoal Flake
Dark, professional epoxy with chip broadcast. Hides everything.
Metallic Epoxy
Silver Metallic
Flowing silver with depth and movement. A strong premium upgrade when shown in the homeowner’s actual basement.
Polished Concrete
Polished Natural
Diamond-ground and sealed. Modern, minimal, zero material cost.
Luxury Vinyl
Weathered Oak LVP
Waterproof wood-look for finished living spaces.
Visualize Any Basement Floor
Snap a photo of the basement, pick a flooring system, and show your client the transformation before you send the proposal.